Wednesday, July 31, 2013

Roman Loungewear

So Costume College is just a day away sooner for some people and I am still scrambling to complete some last minute sewing for a couple different groups. But one costume I have complete is my Roman loungewear outfit :) which by nature of design was the easiest of all my costumes this year to complete! 
There are 3 pieces that make up the outfit: the tunica, which sits next the skin, the stolla which is over the tunica and more decorative, and the last piece is the palla which is a wrap that covers the head and shoulders. All the pieces are rectangles :) 

This site is a great little resource and what I followed to make mine  http://members.ozemail.com.au/~chrisandpeter/radical_romans/female/female.htm

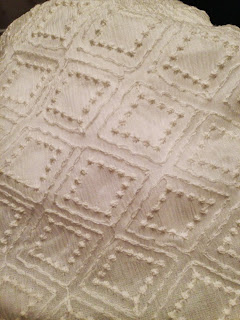
My plain tunica:

The stolla:


A close up of the waist ties:

And a close up of the buttons on the "sleeves"

I have a gold palla and gold sandals to complete the outfit :)

Tuesday, July 30, 2013

Central Coast Renaissance Fair

Was two weekends ago and what i did all that Elizabethan sewing for.
http://ccrenfaire.com/

It is a very small little fair but we were in a new venue this year that was next to a lake that helped make the fair very lovely and not too unbearable weather wise.

I was very bad and didn't take a single picture! not one! which is a whole new record of failure for me, even though i am bad about taking photos i usually remember to take at least one or two, usually of Michael. But i ended up being so busy both days that i don't think my Phone (camera) even made it out of my bag backstage.

The two photos below were taken by others, that Michael had from his Facebook, so that i could document our remodeled outfits in full on the bog :)
Michael is in the green in the center left, the group is the Privy Council:


Monday, July 29, 2013

HSF Challenge #15 - Elizabethan Coif

Challenge #15:  "is our first colour challenge* for the year, and I'm easing you into it slowly, picking a colour that has lots of options for really easy makes, and has appeared in every possible period." 

I made a simple Elizabethan Coif, out of the same fabric as my partlet and sleeves to cover up my hair and go under my velvet flat cap like in this portrait.
 
Fabric: I made this coif out of the cream colored embroidered silk chiffon that i used as my inner sleeve for the remodel of the Elizabethan dress and lined it with white cotton lawn. All of which came from the stash.
 
Pattern: I used a few different blog tutorials as my references for this but then when it came time to actually construct it just kinda winged it. . .
 
Year: Generic 16th Century
Notions: just a little thread to hold everything together :)
How Accurate: I give this a 7 out of 10. Detracting points for the machine sewing, the machine embroidery on the silk and the cotton lawn as the lining (should be linen). Other then that the shape and the size are correct.
Hours to Create: less then one all together. In all honesty the whole thing from cutting to finishing took about 15 mains :)
First Worn: Two weekends ago at the San Luis Obispo Renaissance Fair
Total Cost: nothing really as the fabric was all stash

Friday, July 26, 2013

Elizabethan Accessories

For this years Ren Fair, rather then making a whole new dress (just no time this year) i remodeled that old dress i wear with new sleeves and new trim and contrast fabric. In addition to those small changes i also wanted to add new accessories that would help the whole ensemble look more like the character I play (Katherine Hastings, Countess of Huntingdon).
The first thing i added was new shoes, not a something you see but i had finally worn out my old ones! I went with these
from this seller here in the US, they are well made, very nearly historically accurate. Also when you add in a nice gel insole they become very comfy like slippers :) next year i think i will make them silk ties rather then the leather ones they can with for lacing.
The next thing was jewelery. In the past i didn't have a whole lot to wear and my dress is rather plain and made of simple fabrics which is good in the sense that we are supposed to be out in the country, but not so good in that it was hard to tell my character was of a high station. So by adding a set of matching jewelry it really made it much clearer what my station was, not to mention it was all pretty and shiny :) I mixed and matched pieces from Sapphire and Sage, and chose metal color and jewel tones to make it a matched set, i also chose colors that i knew i could use with the new dress i am going to make for next year.
I got a girdle, necklace, ear rings, and ring:
The girdle came with a different medallion that i took off and turned into this over necklace and then used this pewter pomander to hang at the end of the girdle. The pomander came from this site:http://www.pewterreplicas.com/detail.asp?id=122&selcurrencies=GBP


The last piece i added to the ensemble was a book, Katherine was know for being very well educated and well read and for spending much of her marriage working with young women of all stations teaching them to read and write. While Katharine would have likely carried around a book of common prayer, i chose to carry around a black book, but one that looked a lot like examples of originals or those in portraits i have collected in my research. I found this seller on Etsy, via a general search for leather bound books: http://www.etsy.com/people/alexlibris?ref=owner_profile_leftnav
 I contacted him and asked if he could make me a book similar to one he was currently offering but just with a different closure. His response was prompt and perfect. He believed he could easily make me a custom book based on my descriptions and references and get it to me in time for my event just 3 short weeks away! And he did, he was incredible responsive to all my questions and requests and worked so quickly. The book arrived in time and exactly as i had imagined it would be, he is true artisan and i will definitely be doing more work with him in the future. 
The book was also not expensive considering it was custom made and it was well received by all who saw it and handled it at the fair :)

Wednesday, July 17, 2013

Old Fort Mac Days

Last weekend out in Long Beach CA was the event Old Fort Mac Days at Fort MacArthur. This is a long running and much loved event by locals and reenactors alike! This is the second year Michael and I have visited the event, while we have many friends in many different groups we have not participated and chose to just dress up and visit for one day and see all our friends and all the great camp set ups.
The event is funny in that it is a military reenactment for every military and engagement in history from the Roman Legion to the Vietnam War and everything in between. Its fun in that you can walk from one camp to the next and go from WWI trenches to an 18th Century cook tent.
Michael likes the event as it allows him to wear uniform that he doesn't have regular events for already (he has a lot of Uniforms from many different British regiments and a wide spread of years). Last year he wore his 13th Hussars full dress kit which is only ever worn when at the SF Dickens Fair so it was very neat to see it out in the bright light of day. And then i just wear a dress that is of the same era as the uniform he wears :) Last year that ended up being one of my many 1860s hoop skirt dresses.

This year Michael chose to wear the full dress uniform for a Victorian British Indian regiment called Probyn's Horse.

The regiment, though British, chose to adopt the Indian style for their full dress uniform when present in India. So the uniform is a long Kurta with very elaborate gold bullion embroidery worn over white riding breeches and tall black riding boots. The headdress is a turban tied Punjabi style and the uniform is worn with a cross belt, wide waist sash and waist belt for the sword.

The majority of Michael's uniform is a very well done reproduction with the exception of the cross belt and all of its silver fittings, the belt buckle and the sword which are originals from the 1870's.
Needless to say the uniform was very impressive and grabbed a lot of attention as it was the only one of its kind at the event and people were trying to figure out what is was, when it was, and where it was from :) It was fun to follow along in his wake and listen to him provide explanations and details, as he really is very knowledgeable about all the regiments and their history that he has uniforms for.
I wore the dress i posted about last week that i made the new petticoat for. With my favorite perchy black hat and white parasol i thought it gave a good impression of an 1870s lady in India :)

It's hard to really see in the pictures but I am wearing a sweetheart pin for the Probyn's Horse regiment! I now have a sweetheart badge for every major regiment Michael collects, it's a lot of fun :)
The weather was beautiful and we really enjoyed visiting all our friends in all the different camps and we had a very lovely picnic lunch in the afternoon sitting up on the upper lawn in the shade of a tree looking out over the ocean to Catalina Island!

Tuesday, July 16, 2013

Elizabethan Fur Edged Robe

For Michael to wear at the faire this weekend . . . His character is part of the Privy Council and they all often wear black robes or mantles to distinguish themselves from just the regular courtiers. Well Michael got it in his head that he wanted it to be fur lined because it would make it very impressive and look more correct as so many of the robes seen in portraits are fur lined (they were in a mini ice age after all). Hans Holbein the famous portrait painter did a few notable men including King Henry VIII wearing fur lined robes.
So we already had the main black robe (its an old 50's ladies coat with the sleeves removed)
and then he found online a nice marmot fur coat that had a similar shaped collar. 
The fur is in amazing condition and is super soft and plush and silky but someone at some point had butchered the sleeves of to little caps and it was kinda ridiculous on its own.

Then it was just a simple matter of cutting up one and adding it to the other . . . HA! not simple at all. To start, this was my first ever experience sewing fur so i had to learn by trial and error. The first thing i figured out was how to cut under the fur along the hide and to match the grain of the fur so it all looked like one smooth complete piece. Then came the jigsaw puzzle of matching and fitting pieces to achieve the shape. Luckily the fur coat had a similar collar to the black robe so i didn't have to create the curve for that. Then it was just a lot of hand sewing to join all the pieces together and then stitch it to the robe. The whole thing took me two days straight to get it done but done it most certainly is.
On a side note i have rather horrible allergies to all sorts of things that grow or have fur so after two days of cutting up (i am still sweeping up little fur floats from that process) and having my face stuffed into it as i sewed it together my allergies had reached whole new levels! needless to say it was quite miserable and i hate fur!! okay i love fur :) and the coat is really nice and there is enough fur left over for a muff or some other such project for me . . . maybe . . . although i think i will invest in a respirator before i work with fur like that again ;)!

Monday, July 15, 2013

Elizabethan - A remodel

As much as I would have loved to have a new Elizabethan dress this year, there is just way too much other sewing prior to this coming weekends fair to have made it happen. So to save on time and my sanity I chose to just remodel the dress that i wore last year, by making a few easy changes to the construction and decoration and adding some new accessories.

Here is the dress before (bad pic I know):

I added diagonal lines of black trim to the bodice front and back to help emphasis the triangle shape and deep point of the mid 16th Century.

And I changed out the tight sleeves for a hanging sleeve with puffed inner sleeve. My inspiration was this portrait of Queen Elizabeth:

I had plenty of the original green material to make the new sleeves but no more of the original copper satin. So i found a new embroidered copper silk that was of the same color; as i really liked the combination of the copper and the dark green and black. i also felt that the embroidery on the new silk would help make the outfit as a whole look more fancy
.
The hanging sleeves were made with out a pattern just some guess work and rough chalked in shape, constructed of the outer green material and lined in the new copper silk. I edged the opening in the same black trim and added buttons to the opening for decoration and also for the closure down at the wrist. I then added the black set in gold Jewels to each button to help further "fanci-a-fy" the dress. 
The inner sleeve was also made patternless and is actually made up of 3 layers of fabric, even though i wanted them to be sheer, i also didn't want them to be too sheer as that wasn't really done based on portraits.
The inner most layer is very fine handkerchief weight cotton, then interlined in a very stiff cream silk organza and then the outer layer is a tone on tone embroidered silk chiffon. the sleeve is very light and will be very breathable compared to the old sleeves but maintains its puff due to the organza. The embroidered chiffon gives the impression of embroidered sleeves, because even though its my preference i don't have the time to blackwork embroider my own sleeves. the cuff is edged in a little gold lace for more "fanci-a-fying".This inner sleeves are detached from the rest of the main dress and they tie into my partlet so they can be removed easily for cleaning but you cant tell that they aren't sewn in.
Because i had to change the original copper silk to make the hanging sleeves lining i also had to change the copper on the under skit and in the neck lining of the main dress. These two pieces i just covered over with the new silk . . . you know just in case i ever change my mind and want to go back the original, the option is still there :)

I will also be changing the collar of my partlet to the embroidered chiffon to match the inner sleeves, i am just changing the collar because the body of the partlet doesn't show at all. I am making the collar taller by a good 2 and half inches and adding a very short tight ruffle to the top. While i would love to have the ruffle be an actual set ruff, again i do not have the time for that detail and it will have to wait till next years new dress.

And here is the dress after:
So whats left:
A coif in the embroidered chiffon to wear under my little floppy cap.
And i think i need more jewels . . . maybe on the embroidered copper silk . . . we'll see what i have time for :)