Tuesday, July 9, 2013

Quickie Sheet Petticoat

This weekend I will be wearing to an event a bustle gown that I made two years ago but due to my new corset
and the new bustle cage 
there are some alterations and additions that need to happen before I wear the dress over these new items.

One addition is a new plain petticoat to wear over my ruffled petticoat to help hide the bumps caused by the ruffles. And as I am short on time I needed a quick and dirty solution. So I returned to my favorite fabric staple - sheets!

Well one sheet to be exact, one queen size white cotton sheet is enough yardage to make the Truly Victorian pattern # 202. Sheets, like curtains are great because you can get yardage of a fabric at a much cheaper rate then buying the actual fabric. In the case of this project the sheet set was $15 (I found them at Marshals) and the top sheet alone was enough yardage for the skirt ( about 4 yards) so in reality I got about 8 yards of cotton counting the top and fitted sheet for $15 which is much cheaper than i could have bought plain cotton for at the fabric store.
And then in just under two hours I had the whole thing cut out and sewn together :) 

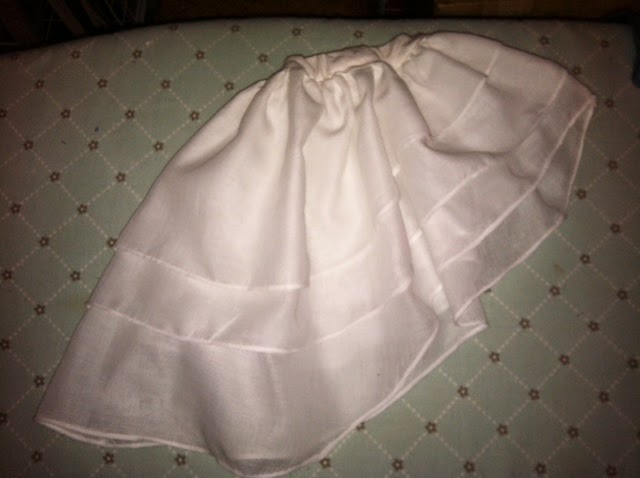
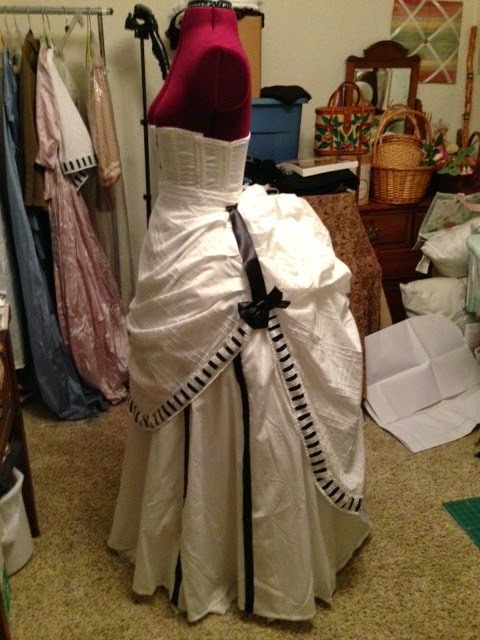
Here are all my layers for this dress including the new petticoat:
The bustle cage

The ruffled petticoat

The new quickie petticoat (yes that is made out of a sheet)

The over skirt

And the apron


Monday, July 8, 2013

HSF Challenge #12 - Pretty Pretty Princess

The Challenge: "Channel your inner princess and her royal wardrobe. Pick a princess, queen, empress, arch-duchess, or a de-facto queen as inspiration for a fabulously royal frock (or other garment). The occasional prince is also most welcome."

I chose to channel my inner Disney princess and made a dress to wear for an upcoming event of 18th Cnetury Disney princesses, I am going as Rapunzel. I wanted to make a dress that would work for that event but also be a perfectly acceptable 18th century dress for use at other events. So here is the dress sans accesories and embellishment that will make it look more like Rapunzel.

Fabric: 8 yards of lavender/ pink raw silk

Pattern: The JP Ryan Robe A L'anglaise a la Polonaise

Year: i went with a bum pad rather then side panniers and am trying to go for the later 1770's look

Notions: two big covered button forms for the Polonaise ties and some bias tape for the petticoat waistband

How Accurate: I will give the dress a 7 out of 10. Material and pattern are all period correct but the constuction was all on the machine so lost points there. I am really happy with the look of the dress for the 1770's style, as for making it look like a Rapunzel dress that is still up in the air as i am still putting together some embellishemnts to help that along . . .

Hours to Complete: roughly 8 hours from cutting out to finished sewing. Doing everything on the machine makes it go very quickly and for some complete freak accident i didnt have to hem the entire dress so that saved a lot of time setting and then sewing. I still have some fitting issues to attack and the front closure to finish for it to be fully complete.

First Worn: not yet, its planned for a group event a Costume college at the end of the month.

Total Cost: the pattern i already had, so it was just the fabric which i remember being about $8 a yard. so lets say $64 total.

Thursday, July 4, 2013

Rapunzel - Finished Dress

The dress is done with just a few small things remaining here and there that would make it fully complete. So I will do the HSF post for the pretty pretty princess dress tomorrow with all the details :)

For now here's a look at how it ended up:
 

Oh yes and Happy Independence Day!

Wednesday, July 3, 2013

New Bum Pad

To go with the 18th Century Princess dress. I'm making that dress is the later style so rather then panniers I needed a good sized bum pad to really get the silhouette.
This was made from sheer guess work and spare materials nothing to really be impressed with but it does do the right shape under the petticoat and dress which is all that matters :)


Tuesday, July 2, 2013

My New Corset

And no I didn't make this one :) 
Yes I know I am perfectly capable of making my own corsets and have done so in the past but they aren't easy and so I left this one to the professionals at Dark Garden Corsetry in San Francisco 

The shop is a gorgeous colorful gem tucked into an alley and I have been ogling their product for over two years now! But this year I finally did it and got one of my own :) 

In typical Cait fashion I chose the most basic and historical shape, the Classic Victorian, in a pale pale pink duchesse satin so it could be worn with all my Victorian dresses. And while some day I would love to have a fully custom corset this one was from their "made to order" line. 
The best part of their corsets to me is the construction. You pick up the corset and can feel that it's well made. All spiral steel bones cut to fit and a front metal busk. The corset body has three layers if fabric for strength and stability and the edges were all bound in the same fabric. 
The fit for not being tailored to me is great, granted I am a fairly regularly shaped person if not a little short waisted so that's not too surprising I suppose. But the corset is so comfortable, no pinching or pressure points. And in this corset I can tighten down comfortably to a waist measurement a good inch smaller then I could on any of my other corset. And i never feel short of breath or faint. However I am now going to have to go back and tailor down many old gowns ;) 


Thursday, June 27, 2013

Los Encinos Victorian Picnic

Last weekend we attended a Victorian picnic at the California historic site of Los Encinos. This is an annual event for us and a favorite at that. The weather wasn't too hot like in past years and we had a nice big turn out, making for a lovely picturesque afternoon with friends :)


Micheal wore my favorite houndstooth waistcoat and pants with a dark jacket and a bowler. 

I wore an old cotton bustle gown that hadn't been out in at least a year with my original straw hat. The exciting part of the dress was getting to wear the dress over my new corset! Yes I have a new corset, yes I will post on it tomorrow :) 

Many photos courtesy of photographer Steve Farrow


Monday, June 24, 2013

Moving on to the next project

. . . its time, the last big project is all cleaned up and packed away. This next one is gonna be for an upcoming costume college group - 18th-century Disney princesses, as well as meeting the last HSF challenge pretty pretty princess. 

I'm going to make an 18th century robe a l'anglaise but I'm going to make it with a few simple modifications so it looks kinda like the dress Rapunzel wears from the new Disney movie. 

I have a light lavender, nearly lilac colored, raw silk taffeta for the main body of the dress and the petticoat. 

And the pattern is the JP Ryan's robe a l'anglaise that I used for my first 18th century dress. 

Saturday, June 22, 2013

NorCal Pirate Festival

Last weekends event was up in the Bay Area on the water front. This was the second year we have attended the Northern California Pirate Festival. 
As with last year we had an absolute blast with all our friends as part of Government House. 


Michael participated with the military guys and the governor and I spent my time with the ladies. 


There was a little sewing and a lot shopping and shenanigans :) on Sunday morning a few of us ladies ran away and joined the girls at the House of the Rising Sun and played at being courtesans till we were discovered and chased out ;)  We ladies even got to play the key role in rescuing the governor after he was kidnapped by pirates. 

The weather was actually cool and made wearing all the clothing pleasant though it was almost too windy for me to walk around on Saturday for fear of being blown right off the ground in that big dress.

On Sunday evening my friend laura and I played a betting game from the 18th century that ending up being silly and fun.


We had a great lunch both days with everyone pitching in and providing something and Juliana making sure was all beautifully presented and well displayed.


Both Michael and I were very happy with how our outfits turned out and held up to the two day event.


I tried to remember to take more pictures this time but the lot was still pretty weak ;)

Wednesday, June 19, 2013

Robe Battante and Coldstream Guards Finished

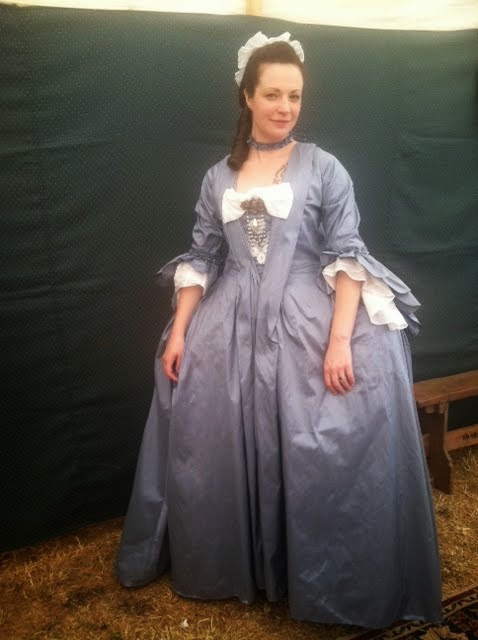
Here is a quick look at both our outfits from the event last weekend:
Me with all my accessories on :)
Michael in the uniform all complete!

More photos and details from the event to follow

Thursday, June 13, 2013

Accesories for the Robe Battante

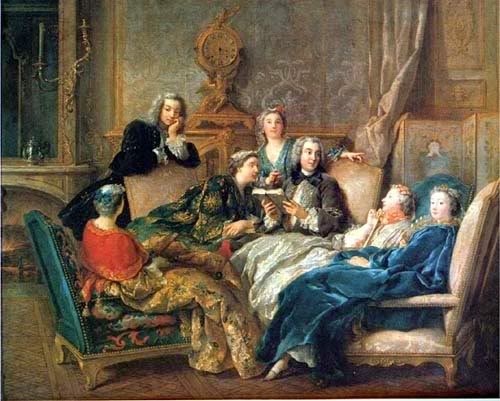
As stated in a previous post there are a few accessories I wanted to add to my Robe to really complete the outfit. The first is a set of under sleeve flounces. I wanted these to be really dramatic to match the Robes' scalloped sleeve flounce. I was using this original painting as my guide:
 
Using the same material as my fichu and apron. I cut out three different widths, all slightly longer in the back then in the front 

and finished the bottom edge with a small rolled hem (machine done, as time is of the essence). Next I sewed the 3 layers together and ran a gather stitch around the top and gathered it into a narrow band just a little bigger then my arm. Then to help keep them up on my arm I ran a thin elastic through the band and set them to my arm size. 

The elastic is not period, a drawcord to tie them on would be more period, and almost just as easy, but I was working in a rush and this didn't cross my mind until after I had closed the elastic into the band. It would be an easy enough fix in the future (when i am not scrambling for time) to open up the band and replace the elastic with a cord.
 
Next came a head covering. Caps are the go to for the18th Century but the mob cap I made earlier in the year is not the right style for this earlier period. Instead it appears they preferred a small round cap the was pinned to the top/ back of the head with optional lace lappets, or tails. These paintings came from my archives:
 
 
and this site has nice descriptions by decade of the shifts in styles in everything from hair to shoes, though brief, it is a nice general reference.
My favorite little cap came from this painting and that is what i based mine on. It was the little colored bow in the back that struck my fancy :)
 

Again using the same material as the sleeve flounces so that all these accessory pieces will match and therefore be relatively interchangeable with other outfits. I gave my little cap a ruffled edge for decoration, and i might add a little lace as well if i can find something small that i like between now and Saturday ;)
 
I think i made it a little too big but i hope once i have my hair all piled up on my head that it will be just right :)
This next piece I'm not sure i am really happy with and may change if i can figure out something better but for now it will work and allow me to wear the Robe . . . I made a matching stomacher. I made it with a heavy canvas interlining and about a half dozen plastic bones for extra rigidity. 

But all on its own it was just too plain, so i added these little pieces of lace that for not too close up look like embroidery and the big white bow across the top that seems to be a common decoration/ functioning closure in the period.
 
I'm thinking about ripping off the lace and adding lacing instead like the original below . . .not sure . . .
 
And last but not least i made a little ruffle of my white material to edge the neckline on the Robe, its only really tacked in along the back, but its to help hide all the tattooing i have ;)